One of my favorite blogs, Between Naps on the Porch, recently posted an adorable, easy to make, "sundae" centerpiece for the 4th of July. I slightly tweaked her craft how-to, which you can find on her site also known as
BNOTP, but let's start with mine first, shall we?
Note: The directions are to make two "sundaes" but you can make as many or as few as you would like. Most of my decorations came from my favorite craft store...Hobby Lobby.
The cast of characters:
*Two sundae style or milkshake style glasses
*Several bags of patriotic style bite-size candies (I used butter cream candies)
*A 4-inch Styrofoam ball (cut in half)
*An assortment of patriotic decorations ~ I am using pinwheels, decorative metal stars and fireburst style decorations
*Pieces of scrapbooking paper in various colors of red, white and blue (some solid and some printed)
*Several colorful plastic straws
*Several 4-6 inch pieces of colorful paper, tissue paper or tulle to represent the whipped topping
*Two pieces of red candy or truffle to represent the cherry on top
*T-pins, ballpoint pens
*Temporary double-sided tape (optional)
*Craft glue OR hot glue gun (optional)
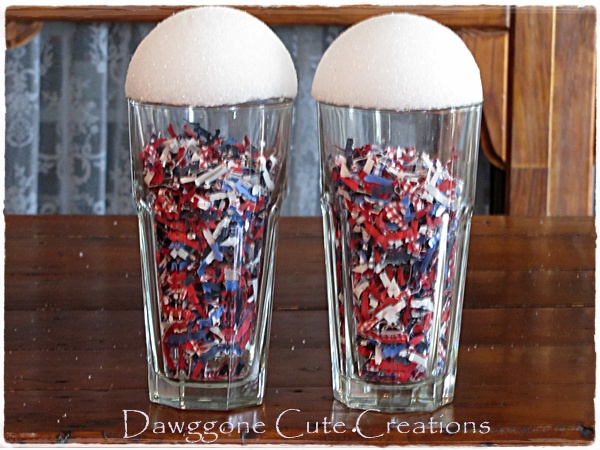
I used my handy-dandy paper shredder that not only shreds the paper but crinkles it as well...much cheaper to make my own instead of buying it already shredded! My sundae glasses are only 6 inches tall and work great for a small centerpiece, but I wanted something a bit larger and went to Wally World (aka Wal-Mart) and purchased these milkshake style glasses that were 7 inches tall for a larger "sundae".
Cutting my Styrofoam ball in half, I then took about 1-inch strips of temporary double-sided tape and placed them around the flat side of the ball. I found it much easier to do it this way than using one long strip...or else it will be kinda like putting a square peg into a round hole :/ Removing the glossy coating requires lots of patience or really long fingernails -but so much easier in the long run if you want it to be temporary. Otherwise, use a hot glue gun to make it permanent.
Either way, press the ball firmly on top of the glass.
This part is easy...start around the bottom of the ball attach and work your way around by using T-pins or ball point pins to attach your candies. Overlap the candies slightly to hide the Styrofoam. The pins make it easier to adjust placement if necessary. You could even add more candies if you would like! Note that I alternated the patterns of the candy to give a more colorful effect. Oh, if your candies have a lengthwise seam, make sure they are on the bottom side and not exposed.
Now start the second row overlapping the candies somewhat. If you want LOTS of candy, then make tighter rows. As you can see, I used four rows to cover the Styrofoam.
There's a little bald spot on the top!! Don't worry...it will be covered up by the time you're done.
I didn't have any tulle, so I decided to use the red wrapper from my fireburst decorations. It's not the right color, I know, but I wanted to see what it would look like. :) I scrunched it in the middle and attached it to the bald spot on the Styrofoam Note: Use the T-pin on the outside of your point so that the scrunch will keep its shape. Bend your plastic straw, slightly off center, and secure the straw to your sundae by using a T-pin in the crease of the straw and place it into the middle of your "whipped topping".
I couldn't find any red candy at the moment, but secure a piece of red round candy down in the center of your "sundae". You may need to use some glue to do that. My metal star and pinwheels were just a tad long, so I used a metal clipper to cut off just a bit and then inserted them where I wanted.
Now I thought I would try to use these little babies. I had to twist and turn to get the firebursts out of the hockey puck-like base.
I had intended on taking them apart and scattering smaller pieces around my "sundae" but the wire was rather heavy and it was very well secured. So I decided to try it with one large fireburst.
Taking the red paper, I scrunched it in the middle making a point and cut off just enough of the tip so that I could push my fireburst through the opening about an inch. Using your hot glue gun or some craft glue, secure the scrunch of your paper to the straw so that it doesn't lose its shape. Now push it into the bald spot of your Styrofoam. Using my metal cutter, I cut off just a bit to shorten the sticks and then added them to my "sundae". This ended up not really looking like a "sundae" but more like a festive table decoration, so I didn't add any straws. I still wasn't too sure if I was going to like this one but that's the joy of applying things temporarily..you can always change them out! Hehehe...
So here they are! What do you think? I know I'm going to have to sleep on the idea of using the festive fireburst and red paper. I'll let you know tomorrow.


4 comments:
I like the one with the firebursts the best; I think it looks more festive. =D And I think the red paper looks really good. Maybe it looks different in person but in the pictures, I think it goes together.
Hey Velma,
Thanks so much for visiting my blog! I have signed as follower on your blog. If you would sign in on mine too. Did you set your blog up yourself? I have had some problems with mine (such as the picture size) but have not figured out how to fix it. Any suggestons??? I love what you have done with your blog. I am open to any suggestions you have. It will be great to get to know each other through blogging! I love your post for today. Will be talking to you in blogland soon!
Thank you Sharon. Yes, I would love to follow your blog as well. No, I didn't design mine. I used a free background from hotbliggityblog and had her design the matching header and post divider.
I'll email you about my roadblocks about learning this blogging thing and maybe we can help each other out.:)
Thank you for the kind comments.
It was a good idea to buy your own paper shredder! For people like us with a burning passion for paper crafts, a paper shredder is a really good creative investment! Ever since I bought one for myself, I’ve made a lot of wonderful paper art out of shredded used paper.
-Ruby Badcoe
Post a Comment